Archive for September 2012

My Hobby (IT assignment)


.

Workshop practise


.

This pictures were taken in the workshop on this Saturday. We were ask to build a container and i would like to say 'Thank you' to my friends for helping and guiding me to build it successfully.

This equipment is used to cut metals.


This is where we measure, cut and hammer the metals to build the container.

Social networking - Myspace


.

This is a group assignment and this slideshow is about myspace:-

In the NEW Building (LT)


.

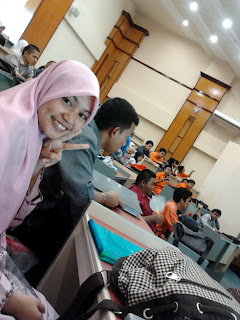
Yesterday, the groups 'A' and 'C' of marine department went into the new building to learn Electrical Technology and Naval Architecture (Huhuu!). We had entered the Lecture Theatre (LT) room, it is very different from the old ones BUT the concept is almost similar to the LT near the computer networking department (where we learn MS). Here are some picture of yesterday moments:-


Twitter tools


.

There are six important tools in twitter, class notices, networking, research, brainstorming, photo sharing and lastly fieldtrip. Now, I will describe about two of them, research and photo sharing.

Research is a process of gathering and analyzing information to increase our knowledge about the particular subject or more.

You are able to search and find information regarding to any person or subject you are interested in, directly or by doing a research in twitter.

You can use this tool when you are curious about something, for example you are absent for the whole day and you miss out a lot of thing. You can search your friends’ twitter to know if they have post or upload some valuable information on that day.

By doing research, you can get more information as in text, pictures or videos.

However, sometimes the information given is not properly delivered or lack of information. Furthermore, the information could be a false or fake. So users should not completely believe in the data given.

You also can start doing research by commenting on others to get more data or find more about ‘research’ in different websites.

Photo sharing is the publishing or transfer of a user's digital photos online, thus allowing you to literally “share photos” online with your friends, family, and colleagues.

You can upload, store, organize photos, tag, share, and discuss photos with your online community.
Twitters also provide multiple views (such as thumbnails and slideshows), also have the ability to classify photos into albums and able to improve presentations for conferences and other meetings.

You can share your best moments with photos, albums, slideshow etc in twitter anytime as long as you have internet access and devices such as mobile phone or laptop.

Moreover, it takes just a short time to upload the pictures and it is free. You also have the option of setting permissions on each photo (publicly or privately) and also you can share with friends and family over distances.

However, twitter only accepts photos that are 3 MB or smaller and allows .gif, .jpeg, and .png files but not bmp, .tiff, and animated .gif images.

You can get started and able to know about twitter in various websites ‘google.com, yahoo.com etc.’ and also by viewing other twitter users’ for getting a basic idea how photo sharing works. Go to this link to know how to share photos on twitter, http://www.wikihow.com/Share-Photos-on-Twitter.
To get started on twitter, go to this link:-

Blogger


.

A few days ago,I had present about Blogger in manufacturing room. The reasons I choose blogger are that it is easy to use, it is also free, I'm able to upload pictures and videos easily *I will upload videos in upcoming days-so don't ask me how I know it is easy xD* and I also believe almost everyone in marine department choose blogger...

How to upload PowerPoint presentation in Blogger?


.

1) Go to www.slideshare.net and create an account or just log in.
2) Click 'UPLOAD' if you want to upload one file or click 'UPLOAD+' for more files.
3) Select the file/files that you want to upload.
4) After finish uploading, go to 'My Uploads' on the upper right of your screen.
5) Click the files and you can see the word 'Embed' above your slide.
6) Click 'Embed' and then click 'Copy'

                                                    AND


7) Go to 'Layout' in your blog and add a gadget, 'HTML/JavaScript'
8) Then paste it on the 'Content' and Click 'Save'.

                                                     OR
7) Click 'New Post' in your blog
8) Then paste it and click 'HTML'
9) Click 'Preview' to confirm it and click 'Publish'
TIPS: After pasting the 'Embed', click 'HTML' first before writing your description.